Hi, I’m Calli
Welcome! If you enjoy your visit, be sure to follow me:
Oh My Stars!
Canning Day Quilt

Posts Tagged ‘sewing with children’

A Mini Sewing Lesson

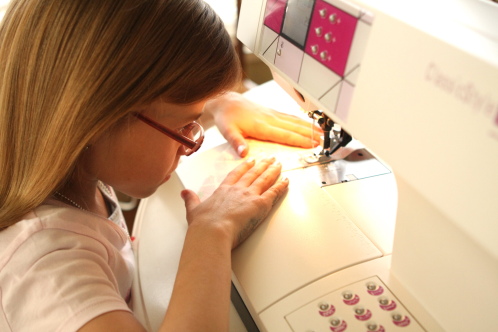
My girls have done lots of handwork when it comes to sewing.  They’ve made pillows, dolls, stuffed animals and embroideries.  But up until recently we haven’t ventured onto the sewing machine.

It’s not for lack of interest.  They’ve probably asked to learn every time they’ve seen me sewing for the last 3 years.  That’s more times than I care to admit.

I must admit to feeling a little worried about it.  I am usually good at sharing (thanks mom and dad)… but this is my sewing machine we’re talking about!

Despite feeling a bit possessive, a few months ago I bucked up and gave the girls each a lesson.  We talked about how the machine works, what the knobs and buttons do, how it is threaded, and a little safety lesson.  We also talked about how to guide the fabric.

Of course we learned what 1/4 inch seam is.  Just as my mom taught me, I talked about watching the side of the presser foot to achieve your 1/4 inch seam and not to watch the needle.

Needless to say, learning to sew on “Mom’s sewing machine” was pretty exciting for the girls.

One of the tricks to teaching a child to sew is to find projects that are quick and easy and that give them a great sense of accomplishment when they are done.

The flag bunting for my girl’s birthday party was the perfect project for a mini sewing lesson.  I used my own tutorial for a flag bunting found here.  Since there were 7 flags, I made the first flag to show the girls proper technique.  I showed them again how to create a 1/4 inch seam.  I also showed them how to turn a corner by leaving the needle in the down position, and how to take the single stitch at the point using the handwheel.  I also showed them how to clip a corner and turn their flag using a chopstick.

Then they each got to make 3 flags.  They helped layout the flags and I sewed them into my homemade binding tape (which took a little more control sewing right along the edge).  It was a great beginning project and they were so proud of the results.

Next project I’m thinking of having them sew cozy pants or a simple skirt…. they’ve done so well, I think they might be up for it.

First Sewing Class

Yesterday was my first sewing lesson for our after school clubs at our local elementary school.  Since my class is mostly 1st and 2nd grade students, my thought was to keep it simple.  I decided to teach one type stitch and sew a project to accompany it each week.

I made these little sewing cards to help teach the stitch and let the kids practice, then we made the project.

For the first class we started with the most basic stitch- the running stitch.  I described to the girls that it called a running stitch because it’s fast, just like when you run.

As you can see from the card, we also practiced a simple two holed button.

The cards were made by printing out a picture and gluing it to the poster board.  I used my small hole punch to make the holes.

For both the cards and the project we used a #22 tapestry needle, which has a large eye and a more blunt tip, but it still capable of going through felt and fabric.

After a bit of practice, the girls made a little shamrock pin to wear on St. Patrick’s day.

I used inexpensive felt and buttons.  I cut out all the shamrocks and used a small dab of glue to adhere the two shamrocks together to make it easier for the girls to stitch.  As you can see they used the running stitch and sewed on a button.  You can also see that this little girl got a little impatient toward the end and her stitch got bigger.  I thought it was still such a nice job.

All of the girls did a beautiful job in fact.  When they were done, we hot glued on a brooch pin to the back.  I hope they wear them with pride tomorrow.

Archives


Virtual Quilting Bee