Hi, I’m Calli
Welcome! If you enjoy your visit, be sure to follow me:
Oh My Stars!
Canning Day Quilt

Posts Tagged ‘planting tomatoes with wall of water’

The Early Bird Gets the Tomato

cflowers3942
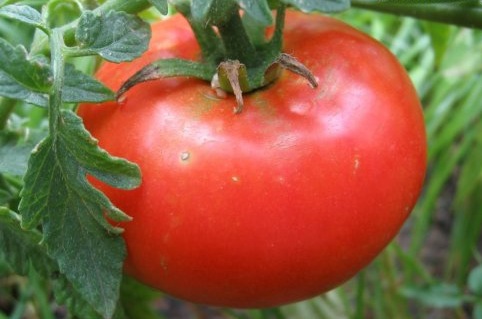
There are few things I look forward to more than the first tomatoes from my garden.   They are a bit of an obsession.  Drew and I love to eat them with salt and pepper and cottage cheese, or sliced on crusty Italian toast with a drizzle of olive oil and a basil leaf.  I put a bowl of the grape tomatoes on the counter and eat them like candy.  OK enough already, my mouth is watering.  Nothing tastes better than home grown tomatoes.

They say good things come to those who wait… and I say do I really have to wait so long?  Actually no.  Several years ago, we bought a pack of Wall ‘O Water.  And now we enjoy those scrumptious tomatoes up to a month early.

If you can’t afford to buy Wall “O Waters, I found a “make it do” way to create your own.  You may need to host a party to get the two liter bottles… or ask friends and neighbors to save theirs for you.  Here’s the link to make your own Wall ‘O Water.  It’s very cool.

Here’s how I plant tomatoes:

1. The first step is to pick your tomato plants at the nursery.  I chose small plants, only costing $1.  The most important thing is to choose healthy plants.  A good rule of thumb is to choose plants that are as wide as they are tall.

2.  Amend your soil with compost.  If you want good tomatoes you need to feed them.  I turned well-rotted manure into the soil on a warm day about a month ago.  Manure is one of the least expensive ways to amend your soil.  You can also make your own compost.

3. Dig a hole deep enough to accommodate all but the top three inches of your plant.

img_13794.  Next cut off all the leaves from the lower branches, until you are left with just the top canopy of leaves.  I know that sounds a bit scary, but trust me your plant will love it.

img_1381 5.  I take the plant out of the container and gently spread out the roots a bit.

img_1382 6.  Next plop it down into the hole.  It looks too deep, but it’s not.  Your tomato is going to send out roots all the way up the buried stem, making it really healthy and vigorous.  Just what it needs to produce lots of tomatoes.  Yeah!

img_1384 7.  Back fill in the soil and then water the plant well.

8.  In about 5 days it’s time to fertilize.  Since I want an organic vegetable garden, I am using fish emulsion or you can buy bat guano fertilizer.  Then fertilize every two weeks thereafter.  I put it on my calendar so I don’t forget.

img_13861 9.  Next I put the Wall ‘O Waters around my plants.  Since we had almost a foot of snow last week, I’m not taking any chances.  Just think of all the tomatoes I am going to get from those $1 tomato plants!

One last thing I have to share.  It has been so cold here with rain and snow.  But finally this last weekend it started to warm up.  I wanted to share a few pictures from my garden that make me oh so happy because it says Spring is finally on it’s way.

img_1287

It's my lettuce... growing despite the snow!

Viburnum.. I need to think about it to remember what variety.

img_1294

img_1290 It’s the little things that I love….

Archives


Virtual Quilting Bee