Hi, I’m Calli
Welcome! If you enjoy your visit, be sure to follow me:
Oh My Stars!
Canning Day Quilt

Posts Tagged ‘patriotic table runner’

Fireworks in the Kitchen- Table Runner

mla102658_0707_july4thtable_l

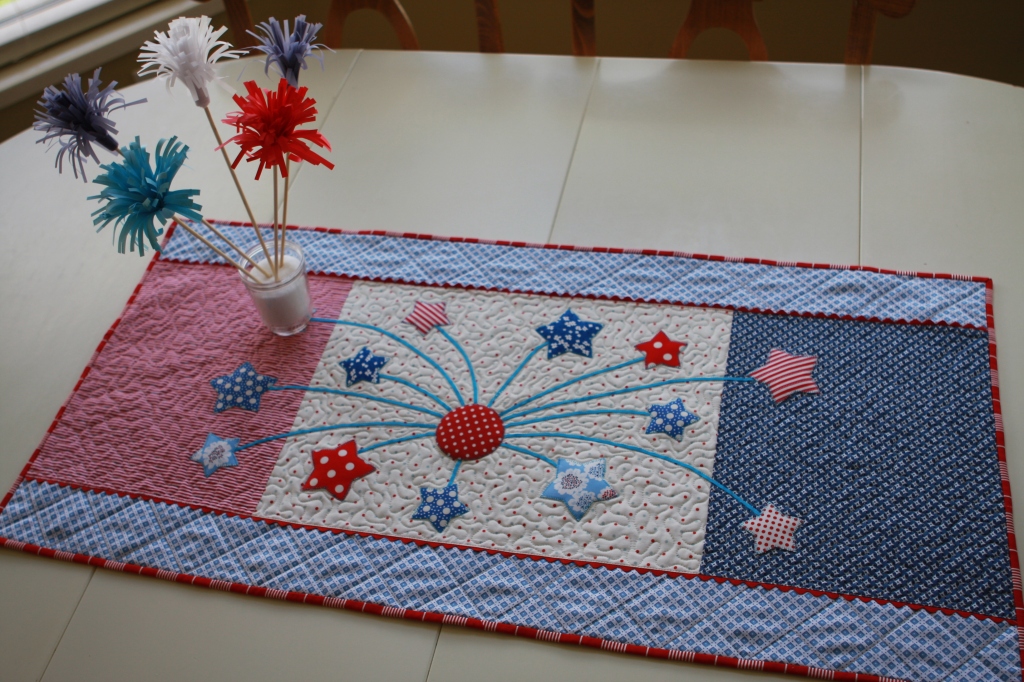
My kitchen table is in need of some serious sprucing up for the 4th of July.  I went looking for ideas and, as I often do, ended up at Martha Stewart’s website. I wanted a project that wouldn’t cost a lot to make.  These firework pom poms were just what I was looking for. But I also wanted a table runner that could go with them.  The runner they show in the picture wasn’t what I wanted, but it gave me a firework idea. After several wildly different concepts of how to create a firework I came up with a wonderful idea.  I could use ribbon to make the explosion.

IMG_4270

Here’s a tutorial on how to make this fun Quilted Firework Table Runner: Here is a printable PDF of the instructions: You will need:

  • 1 piece of red fabric- 11″ x 13 1/2″
  • 1 piece of blue fabric- 11 x 13 1/2″
  • 1 piece of white or cream fabric- 18″ x 13 1/2″
  • 2 borders of light blue fabric-  3 1/2″ x 45″
  • 1 package of red medium rick rack (2 1/2 yards)
  • 3 yards of blue 1/8 inch ribbon
  • thread that matches the ribbon
  • assorted fabric for 8 small stars and 5 large stars in reds and blues (I used six different fabrics– all scraps!)
  • red fabric for center circle- 2 3/4″ wide
  • Wonder Under
  • 1/4 yard red fabric for binding
  • 5/8 yard fabric for backing
  • quilt batting

1.  Using a scant 1/4 inch seam, piece together the blue to the white fabric sewing the 13 1/2″ edges together.  Piece together the red to the white.  This creates the center piece.  Press seams toward dark fabric. IMG_4148 2. Lay the rick rack against the long side of the center piece.  Sew into place with a scant 1/4 seam.  (Keep your stitching on the outer edge of the center line of the rick rack.) IMG_4152 3. Lay border fabric on top of the rick rack and pin into place.  The border is longer than the center and will be trimmed after it is sewn.  Turn the fabric over and following the line of your stitching of the rick rack, stitch into place.  Repeat on other side of runner. IMG_4171 Once both sides are sewn, trim even with the center. IMG_4158 4.  Press rick rack towards the border. IMG_4178 5.  Make the stars and circle by tracing pattern to the smooth side of wonder under.  I used cookie cutters and a cup… but I made a printable template for you. IMG_4183 Iron to the wrong side of fabric. IMG_4187 Cut out. IMG_4189 Lay out the circle roughly in the center and the stars around it in a pleasing pattern. IMG_4188 6.  Working from the circle lay out ribbon connecting to each star and cut leaving an extra 1/2 inch to fit under the circle and star. IMG_4193 7.  Pin circle, stars and ribbon into place. IMG_4204

8.  Using matching thread, stitch the ribbon into place.  You will need to remove the circle.  Remove each star when you stitch ribbon and then pin it back into place immediately to keep it organized.

IMG_4207

IMG_4224

9.  Stitch around circle and stars using decorative stitch.  (I used a small blanket stitch.  My mom would never consider doing anything but applique!  Do what suits you.)  Press well. 10.  Layer top, batting and backing and quilt.  I am lucky enough to have my very talented Aunt Karen who quilted it together beautifully on her large quilting machine.  Her company is called Stitched in Time (which she did!)  You can also quilt by hand or on your sewing machine. IMG_4234 11.  Sew on the binding.  (if you want to make this project really easy, you can skip the binding by layering the top to the backing right sides together.  Place the batting to the wrong side of the top.  Stitch around the outer edge, leaving a 6 inch opening at the bottom.  Turn and press.  Stitch the opening closed.  Quilt together.

IMG_4257

IMG_4258

If you live in Utah and need something quilted call my Aunt Karen at Stitched in Time (801) 278-1152.  She is ultra-talented and as good as gold!  Thanks Aunt Karen for quilting my runner so fast and beautifully!

IMG_4281

Just a note about making the bamboo skewer fireworks from Martha Stewart…. I had some trouble finding colored vellum.  I guess that’s what you get when you live in a small town.  I did find the dark blue(ish) vellum and white, but for the red and light blue I just used colored printer paper from the copy shop.  I thought the printer paper was easier to work with and looked better.  Plus it was a lot cheaper than vellum.  I used 8.5 x 11 sheets of paper, cut in to 3′ strips lenthwise.  I laid a strip of the double stick tape down, laid another strip right on top, and then cut the 1/8″ cuts through both sheets at once (leaving about a 1/2″ at the bottom to wrap around the skewer.)  Then I laid another strip of the tape along the whole length and rolled it up.  I used the edge of my scissors to curl the outside strips.


Archives


Virtual Quilting Bee